
How to Bring a Photo to Life in 2026 (Step-by-Step)
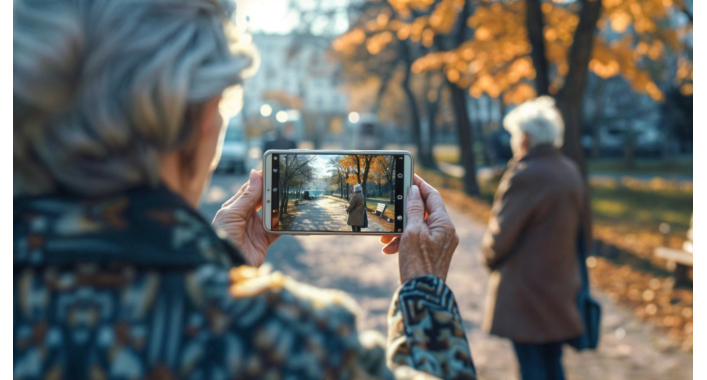
Bringing an image to life is not something only specialists with professional instruments can do. You can easily animate your photos through different creative tools.
Modern platforms can offer you automated features and smart presets. They make this process more intuitive and realistic. Still, you need a proper structure to achieve professional results.
Keep reading and learn the steps of bringing your photos to life!
Core Technologies Behind Living Photos
You can use different advanced tools to create living photos. These innovations can help you convert static pictures into dynamic visuals. We want to tell you about the key technologies that enable this process.
AI Image Animation
AI image animation is the foundation of living photos. This technology uses deep learning models to simulate realistic movement within a still image.
It relies on neural networks trained on extensive datasets of human faces and motion patterns. You don't have to do any manual work.
AI can analyze facial features in your shot and generate various subtle motions. It can also liven diverse inanimate objects in your pictures.
Modern AI animation tools use specific techniques, like
- Facial landmark detection
- Motion transfer
- Temporal consistency modeling
You get a seamless transformation from a static photo into a short animation.
Generative Video Models
Generative video models take AI animation further by creating entirely new frames between existing ones. These models generate short video sequences from a single picture or minimal input.
These models are more advanced than simple animation loops. They can extend motion beyond predefined patterns and create cinematic effects, like
- Zoom
- Parallax
- Camera movement
They predict how a scene evolves to maintain visual coherence. This allows you to create more complex and expressive living photos.
These models are especially influential in storytelling. They expand a single photograph into a short narrative clip.
Depth Mapping and 3D Reconstruction
These technologies enable a sense of spatial realism in living photos. They estimate the distance between objects and the camera to create a layered representation of the scene.
AI predicts which parts of the image are foreground and background. Next, it isolates elements so they can move independently. The 3D scene reconstruction technology lets you build a virtual model of the image.
So, you can create diverse effects, like
- Parallax movement
- Realistic perspective changes
- Selective motion
Your living photos gain a more cinematic quality, enhancing their realism.
AR Integration
AR integration brings living photos into interactive environments. You can project them into your surroundings using smartphones or AR glasses.
These pictures will respond to your touch or movements. They will also integrate with real-world lighting and perspective. You can achieve these functionalities through
- Spatial tracking
- Live rendering
- User interaction systems
AR converts living photos from passive visuals into interactive experiences. It is especially valuable for marketing and entertainment domains.
Key Steps of Bringing a Photo to Life
Transforming images is not a difficult and lengthy task anymore. You can use various AI tools and intuitive platforms to bring photos to life. However, producing quality results requires detailed planning and attention.
Here are some steps you should complete to create engaging living shots.
Step 1: Select the Proper Photo
The foundation of any successful living photo is the original image. Ideally, you should choose a sharp and high-resolution shot. It will help AI to detect facial features and textures.
You also have to consider the emotional and visual impact of the photo. Images with clear expressions translate better into the subtle animations we mentioned above. Photos with distinct layers are more suitable for depth-based effects.
We also suggest you avoid using
- Low-resolution or pixelated images
- Photos with extreme lighting
- Highly cluttered scenes
Selecting the right image allows you to avoid unnecessary corrections later.
Step 2: Pick a Tool or Platform
Your next step is choosing the proper tool for working with your pictures. The market offers a range of simple mobile apps and more advanced desktop and cloud-based solutions.
You can start with a tool that offers prebuilt templates and automated features. It allows you to generate animations quickly without technical knowledge. More advanced users might prefer platforms that provide manual controls.
You have to consider several factors when evaluating a platform, including
- User interface
- Types of animations available
- Processing speed
- Rendering quality
- Export options and file formats
- Additional features
You can also test a few tools before committing, as each platform may interpret and animate your image differently.
Step 3: Animate the Subject
This is the core step where your static image begins to move. Most platforms will automatically analyze your picture after you upload it. They suggest animation options based on the detected subject and scene.
You can typically choose from diverse animation styles, including
- Facial movements
- Camera effects
- Environmental motion
Some advanced tools also allow motion transfer. You can apply movements from a reference video to your image.
Step 4: Include Audio (Optional)
Audio can upgrade your photo from a simple animation to a more immersive experience. So, you can incorporate
- Voice narration
- Background music
- Ambient sound effects
Some platforms can also offer you lip-sync technology. You can match animated portraits to spoken words with realistic mouth movements. This feature allows you to design talking avatars and individualized messages.
Step 5: Export the New Version
Your final step is to export your new photo in the suitable format. Most platforms offer multiple options depending on your content goals.
You should reevaluate some important settings before exporting, like
- Resolution
- Aspect ratio
- File size
You also need to preview the final version to ensure there are no problems. Then, you can share it on your social media or website.
Additional Creative Tips
Creating an effective living photo requires more than applying animation. So, here are some tips to help you improve your strategy and produce more realistic animations.
Ensure Subtle Motion
Adding too much animation is a common mistake. It might be tempting to include more movements or exaggerate effects. Yet, it usually leads to unnatural results.
Motion is typically small and gradual in real life. So, you need to mirror these nuances to ensure your shot is natural. It's important to enhance the image instead of distracting from it.
Optimize Lighting and Shadowing
Proper lighting influences the sense of motion a lot. Modifying brightness and shadow levels helps you create a more realistic photo.
You have to account for how natural light affects the scene. Soft shadow movement can enhance depth and dimension. You can also change the highlights to accentuate motion in certain areas.
Make sure these changes match the original conditions of your photo.
Combine Multiple Effects Carefully
Multiple animation effects can help you create a richer result. However, you need to handle this task thoughtfully. Combining too many elements will make your image chaotic and artificial.
So, you should make sure that the effects complement each other. We also recommend that you layer them gradually. You can test different combinations and preview the results to determine the right ratio.
Conclusion
The process of bringing photos to life used to be pretty complex, as you needed specific technical skills. Now you can use diverse AI tools and innovative platforms that simplify this task. However, you still need a systematic approach.
Some of the basic steps to follow include
- Picking a proper photo
- Appropriate tool choice
- Animating the subject
- Audio enhancement
- Exporting and sharing
You can improve your shots even more by keeping the motion subtle and using lights and shadows correctly. Hope that our guide was useful to you!





It's free and takes 2 minutes. There are 1500+ digital agencies in the catalog that are ready to help in the implementation of your tasks. Choose and save up to 30% on time and budget!